 |
Java Servlets |
| << JAVA Web Application Development |
| JAVA: Creating a Simple Web Application in Tomcat >> |

Web
Design & Development CS506
VU
Lesson
26
Java
Servlets
Servlets
are java technology's answer
to CGI programming. CGI was
widely used for generating
dynamic
content
before Servlets arrived. They were
programs written mostly in C,C++
that run on a web server
and
used
to build web pages.
As
you can see in the figure
below, a client sends a
request to web server,
server forwards that request
to a
servlet,
servlet generates dynamic
content, mostly in the form of HTML
pages, and returns it back to the
server,
which sends it back to the client. Hence
we can say that servlet is
extending the functionality of the
webserver
(The job of the earlier
servers was to respond only
to request, by may be sending the
required
html
file back to the client, and generally no
processing was performed on the
server)
What
Servlets can do?
Servlets
can do anything that a java
class can do. For
example, connecting with
database,
reading/writing
data to/from file
etc.
Handles
requests sent by the user
(clients) and generates
response dynamically (normally
HTML
pages).
The
dynamically generated content is send
back to the user through a webserver
(client)
Servlets
vs. other SSP
technologies
The
java's servlet technology
has following advantage over
their counter parts:
Convenient
Servlets
can use the whole java API
e.g. JDBC. So if you already
know java, why learn
Perl or C.
Servlets have an
extensive infrastructure for
automatically parsing and decoding HTML
form data,
reading
and sending HTTP headers, handling
cookies and tracking session etc and
many more utilities
Efficient
With
traditional CGI, a new
process is started for each
request while with servlets
each request is
handled
by a
lightweight java thread, not a
heavy weight operating
system process. (more on
this later)
Powerful
Java
servlets let you easily do several
things that are difficult or
impossible with regular CGI.
For example,
servlets
can also share data among
each other
Portable
Since
java is portable and servlets is a
java based technology
therefore they are generally
portable across
web
servers
Inexpensive
There
are numbers of free or
inexpensive web servers
available that are good
for personal use or
low
volume
web sites. For example
Apache is a commercial grade webserver
that is absolutely free.
However
189
Web
Design & Development CS506
VU
some
very high end web and
application servers are
quite expensive e.g BEA
weblogic. We'll also
use
Apache
in this course
Software
Requirements
To
use java servlets will be
needed
J2SE
Additional
J2EE based libraries for servlets
such as servlet-api.jar and
jsp-api.jar. Since these
libraries
are not part of J2SE,
you can download these
APIs separately. However these
APIs are
also
available with the web
server you'll be
using.
A
capable servlet web engine
(webserver)
Jakarta
Servlet Engine
(Tomcat)
Jakarta is an
Apache project and tomcat is one of its
subprojects. Apache Tomcat is an open
source web
server,
which is used as an official reference
implementation of Java Servlets and Java
Server Pages
technologies.
Tomcat is
developed in an open and participatory
environment and released under the
Apache software
license
Environment
Setup
To
work with servlets and JSP
technologies, you first need
to set up the environment. Tomcat
installation
can
be performed in two different ways
(a)
using
.zip file (b)
using
.exe file. This setup
process is broken
down
into the following
steps:
1
Download
the Apache Tomcat Server
2
Install
Tomcat
3
Set
the JAVA_HOME variable
4
Set
the CATALINA_HOME variable
5
Set
the CLASSPATH variable
6
Test
the Server
Environment
Setup Using .zip
File
Let's
take a detail look on each
step and get some hands on
experience of environment setup.
1.
Download the Apache Tomcat
Server
From
the http://tomcat.apache.org,
download the zip file for
the current release (e.g.
jakarta-tomcat-
5.5.9.zip
or any latest version) on your
C:\ drive. There are
different releases available on site.
Select to
download
.zip file from the Binary
Distributions � core section.
Note:
J2SE
5.0 must be installed prior
to use the 5.5.9 version of
tomcat.
2.
Installing Tomcat using .zip
file
-Unzip
the file into a location (e.g.
C:\). (Rightclick on the zip
file and select unziphere
option )
-When
the zip file will unzipped a
directory structure will be created on
your computer such
as:
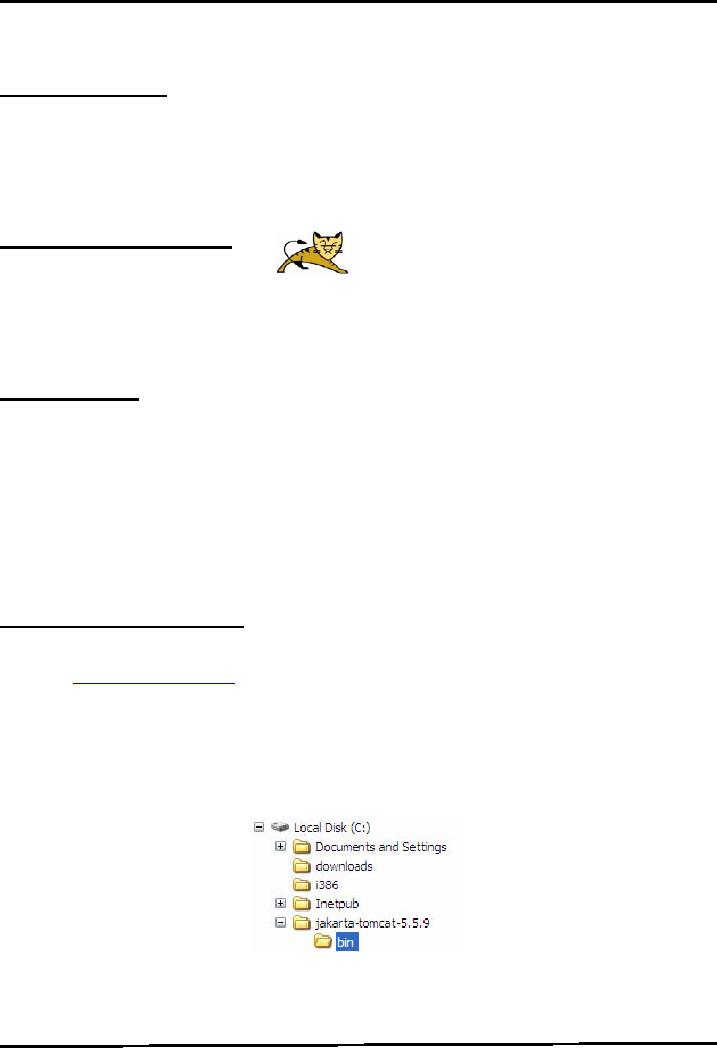
-The
C:\jakarta-tomcat-5.5.9 folder is
generally referred as root
directory
or CATALINA_HOME
Note:
After extraction, make
sure C:\jakarta-tomcat-5.5.9 contains a
bin subdirectory.
Sometimes
students
create their own directory
and unzip the file there such as
C:\jakarta-tomcat-5.5.9\jakarta-
tomcat-5.5.9.This
causes problems while giving
path information
190
Web
Design & Development CS506
VU
3. Set
the JAVA_HOME
variable
JAVA_HOME
indicates the root directory of your
jdk. Set the JAVA_HOME
environment
variable
to tell Tomcat, where to find
java
This
variable should list the
base JDK installation
directory, not the bin
subdirectory
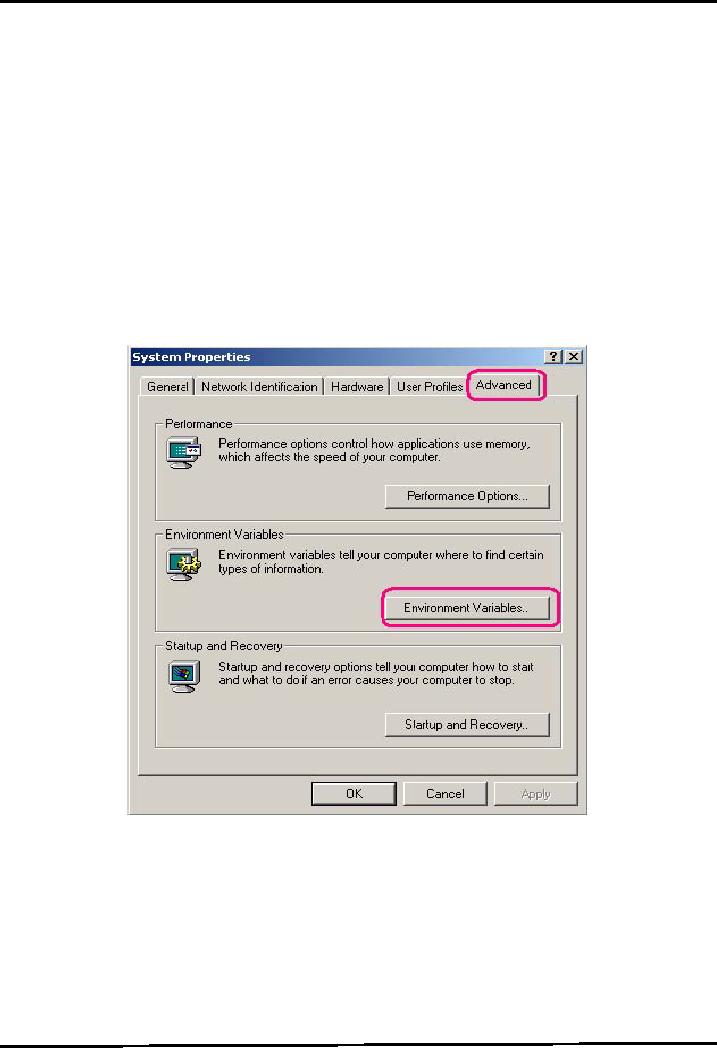
To
set it, right click on My
Computer icon. Select the advanced tab, a
System Properties window
will
appear in front of you like
shown below. Select the Environment
Variables button to proceed.
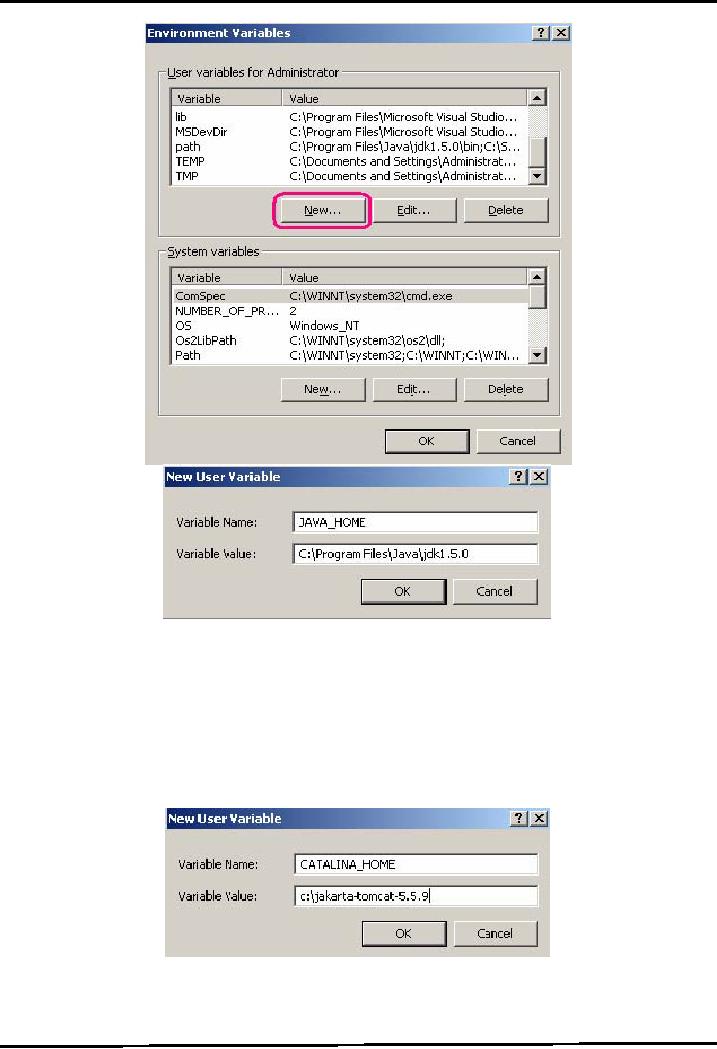
On
clicking Environment Variable
button, the Environment Variables
window will open as shown
next
Create
a new User variable by clicking
New button as shown above, the New User
Variable
window
will appear
Set
name of variable
JAVA_HOME
The
value is the installation directory of
JDK (for example
C:\ProgramFiles\j2sdk_nb\j2sdk1.4.2).
This
is shown below in the picture. Please
note that bin folder is not included in
the path.
Press
Ok button to finish
191
Web
Design & Development CS506
VU
4. Set
the CATALINA_HOME variable
CATALINA_HOME
is used to tell the system
about the root directory of the
TOMCAT. There are
various
files
(classes, exe etc) needed by the
system to run. CATALINA_HOME is
used to tell your system
(in this
case
your web server Tomcat)
where the required files
are.
To
Set the CATALINA_HOME environment
variable, create another User
Variable.
Type
CATALINA_HOME as the name of the
environment variable.
Its
value should be the path
till your top-level Tomcat
directory. If you have unzipped the
Tomcat
in C
drive. It should be
C:\jakarta-tomcat-5.5.9.This is shown
below:
Press
Ok button to finish
Note:
To run
Tomcat (web server) you need
to set only the two
environment variables and
these
are JAVA_HOME &
CATALINA_HOME
192
Web
Design & Development CS506
VU
5. Set
the CLASSPATH
variable
Since servlets and
JSP are not part of the
Java 2 platform, standard
edition, you have to identify
the
servlet
classes to the compiler. The
server already knows about
the servlet classes, but the
compiler
(i.e.,
javac) you use for
compiling source files of
servlet does not. So if you
don't set your
CLASSPATH,
any attempt to compile servlets, tag
libraries, or other classes
that use the servlet
API
will
fail with error messages
about unknown
classes.
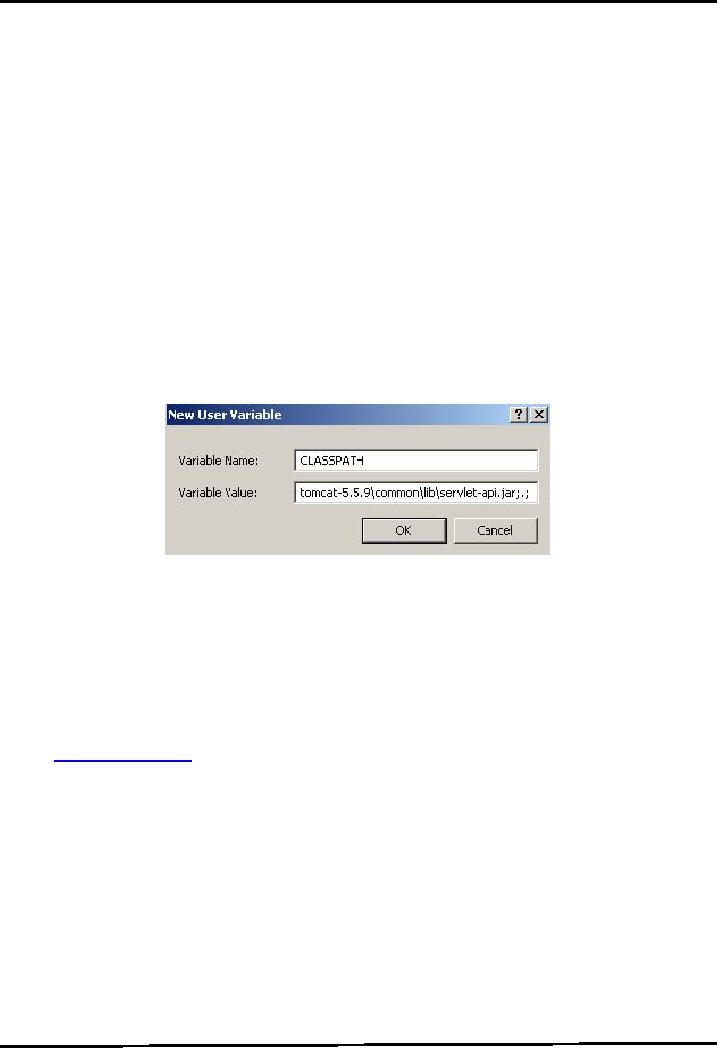
To
Set the CLASSPATH environment
variable, create another User
Variable.
Type
CLASSPATH as the name of the environment
variable.
Its
value should be the path for
servlet-api.jar and jsp-api.jar. These
file can be found on
following
path:
�
C:\jakarta-tomcat-5.5.9\common\lib\servlet-api.jar
�
C:\jakarta-tomcat-5.5.9\common\lib\jsp-api.jar
�
Both
these api's are specified as
values with semicolon between them.
Remember to add
semicolon
dot semicolon (;.;) at the end
too. For example
Classpath
= C:\jakarta-tomcat-5.5.9\common\lib\servlet-api.jar;C:\jakarta-tomcat
5.5.9\common\lib\jsp-api.jar;.;
This
is also shown in the figure
below
--
Press OK button to finish the
setting of CLASSPATH
variable
6. Test
the server
Before
making your own servlets and
JSP, verify that the server
is working properly. Follow
these steps
in
order to do that:
Open the
C:\jakarta-tomcat-5.5.9\bin folder and locate the
startup.batfile.
Double
clicking on this file will
open up a DOS window, which will
disappear, and another DOS
window
will appear, the second
window will stay there. If it
does not your paths
are not correctly
set.
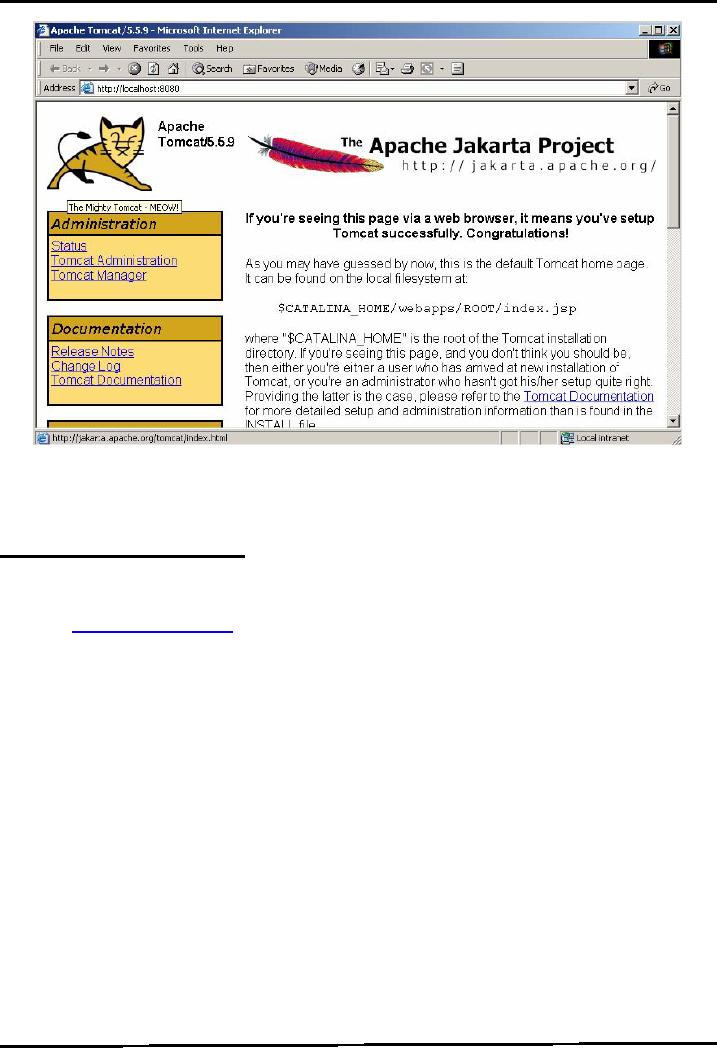
Now
to check whether your server
is working or not, open up a browser
window and type
http://localhost:8080.
This should open the default
page of Tomcat as shown in next
diagram:
Note: If
default page doesn't
displayed, open up an internet explorer
window, move on to Tools
�
Internet
Options � Connections LAN Settings. Make
sure that option of "Bypass
proxy server
for
local addresses" is unchecked.
193
Web
Design & Development CS506
VU
There
is another easier way to carry
out the environment setup
using .exe file. However, it is
strongly
recommended
that you must complete the
environment setup using .zip
file to know the
essential
fundamentals.
Environment
Setup Using .exe
File
Let's
look at the steps involved to accomplish
the environment setup using
.exefile.
1.
Download the Apache Tomcat
Server
From
the http://tomcat.apache.org,
download the .exe file for the
current release (e.g.
jakarta-tomcat-
5.5.9.zip)
on your C:\ drive. There
are different releases
available on site. Select to download
Windows
executable
(.exe) file from Binary
Distributions Core section.
Note:
J2SE
5.0 must be installed to use
the 5.5.9 version of tomcat.
2.
Installing Tomcat using .exe
file
-Run
the .exefile by double clicking on
it.
-Moving
forward in setup, you will
reach to the following window -Select
install type "Full"
and
press
Next button to proceed.
194
Web
Design & Development CS506
VU
-Choose
the folder in which you want
to install Apache Tomcat and
press Next to
proceed.
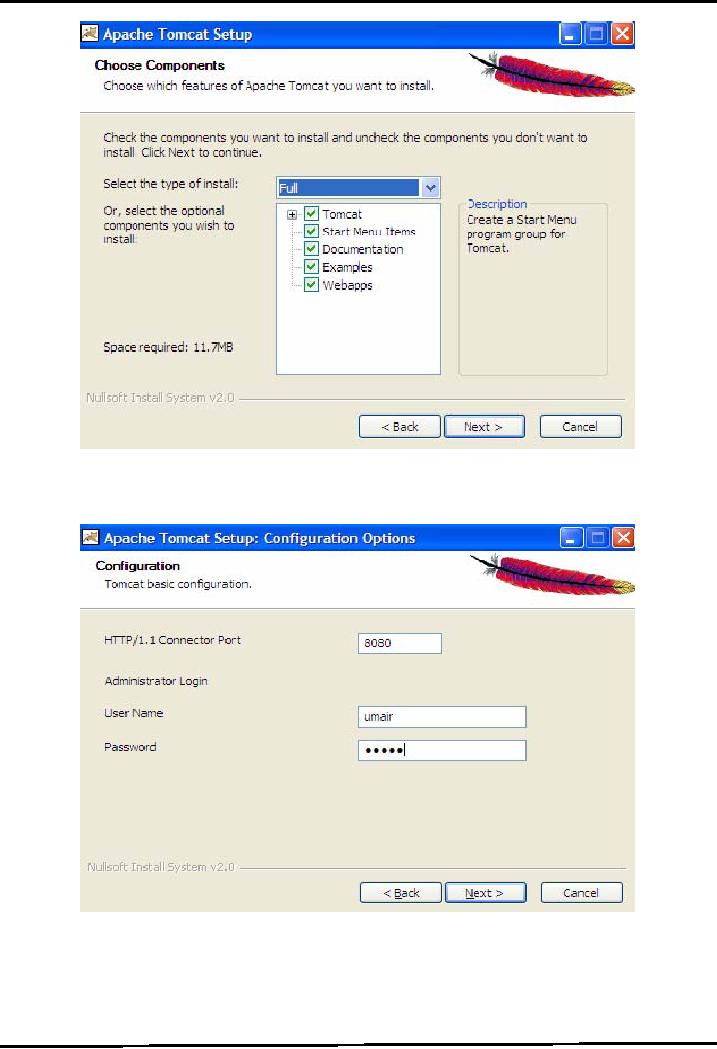
-The
configuration window will be opened.
Leave the port unchanged (since by
default web servers run
on
port
8080, you can change it if
you really want to).
Specify the user name &
password in the specified
fields
and press Next button to
move forward. This is also
shown in the diagram coming
next:
-The
setup will automatically
select the Java Virtual
Machine path. Click Install
button to move ahead.
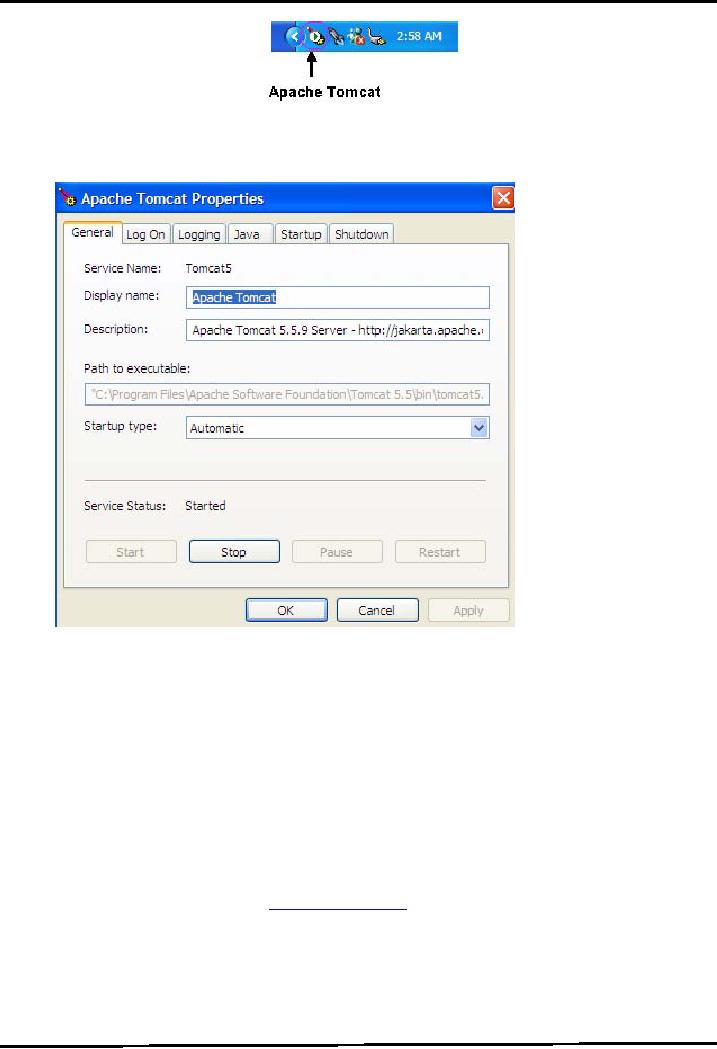
-Finish
the setup with the Run
Apache Tomcat option selected. It
will cause the tomcat server
to run in
quick
launch bar as shown in diagram below.
The Apache Tomcat shortcuts
will also added to
Programs
menu.
195
Web
Design & Development CS506
VU
-Double
clicking on this button will
open up Apache Tomcat Properties window.
From here you can
start
or
stop your web server. You
can also configure many
options if you want to.
This properties
window
is shown
below:
3. Set
the JAVA_HOME
variable
Choosing
.exe mode does not require
completing this step.
4. Set
the CATALINA_HOME variable
Choosing
.exe mode does not require
completing this step.
5. Set
the CLASSPATH
variable
Same
as step 5 of .zip installation
mode
6. Test
the server
If tomcat
installation is made using .exe
file, follow these
steps
-Open the
Apache Tomcat properties window by
clicking on the Apache Tomcat
button from Quick
Launch.
-Start
the tomcat server if it is not running by
clicking on Start button.
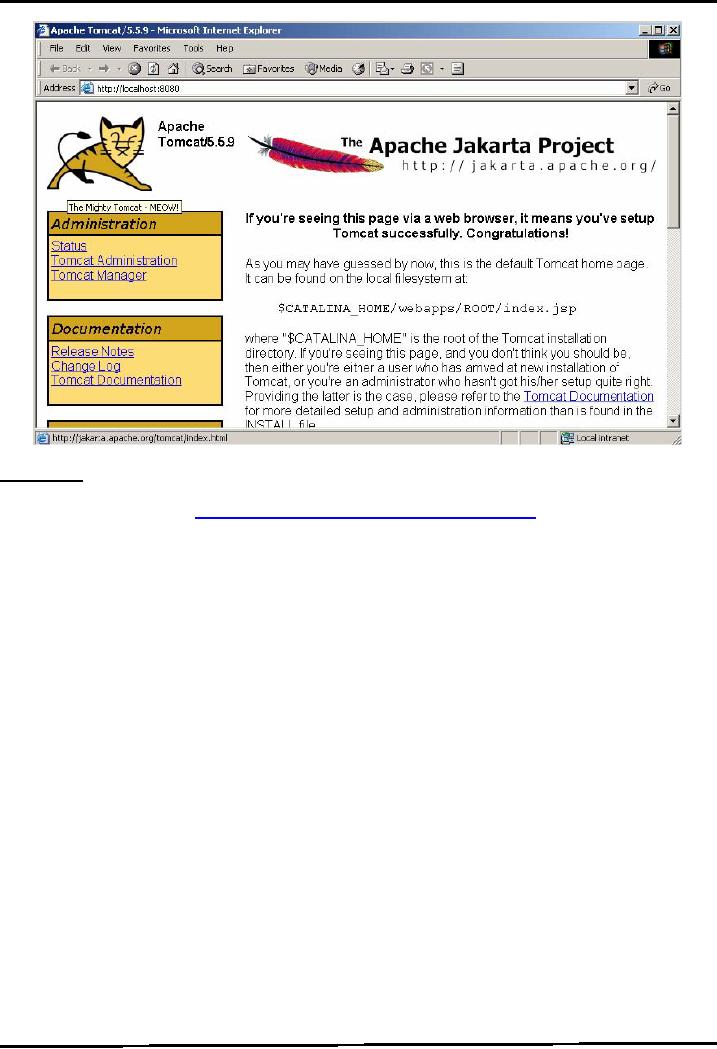
-Open up a browser
window and type http://localhost:8080.
This should open the default
page of Tomcat
as shown in the
next diagram:
Note:
If
default page doesn't
displayed, open up an internet explorer
window, move on to Tools
�
Internet
Options � Connections LAN Settings. Make
sure that option of "Bypass
proxy server for
local
addresses" is unchecked.
196
Web
Design & Development CS506
VU
References:
.
Java, A Lab Course by Umair
Javed
.
Java Servlet & JSP
tutotrial http://www.apl.jhu.edu/~hall/java/Servlet-Tutorial/
197
Table of Contents:
- JAVA FEATURES
- Java Virtual Machine & Runtime Environment
- Learning Basics of JAVA
- JAVA: Object Oriented Programming
- JAVA: Inheritance
- JAVA: Collections
- JAVA: Intro to Exceptions
- JAVA: Streams
- JAVA: Modification of Address Book Code
- JAVA: Graphical User Interfaces
- JAVA: Event Handling
- JAVA: More Examples of Handling Events
- JAVA: Problem in Last Code Example
- Java Database Connectivity
- JAVA: More on JDBC
- JAVA: Result Set
- JAVA: Meta Data
- Java Graphics
- JAVA: How to Animate
- JAVA Applets
- JAVA: Socket Programming
- JAVA: Serialization
- JAVA: Multithreading 1
- JAVA: Multithreading 2
- JAVA Web Application Development
- Java Servlets
- JAVA: Creating a Simple Web Application in Tomcat
- JAVA: Servlets Lifecycle
- JAVA: More on Servlets
- JAVA: Dispatching Requests
- JAVA: Session Tracking 1
- JAVA: Session Tracking 2
- JAVA: AddressBook Case Study Using Sevlets
- Java Server Pages 1
- JavaServer Pages 2
- Java Server Pages 3
- JAVA: JSP Action Elements and Scope
- JAVA: JSP Custom Tags
- JAVA: MVC + Case Study
- JAVA: MVC Model 2 Architecture
- JAVA: Layers and Tiers
- JAVA: Expression Language
- JAVA: JavaServer Pages Standard Tag Library (JSTL)
- JAVA: Client Side Validation & JavaServer Faces (JSF)
- JAVA: JavaServer Faces