 |

Database
Management System
(CS403)
VU
Lecture No.
33
Reading
Material
Programming
Microsoft Access
Mastering MS
Access
Overview of
Lecture
o Designing
Input Form
o Arranging
Form
o Adding
Command Buttons
In the
previous lecture we have
discussed the importance of
user interface. It plays
an
important
role in the development of
any application. User will
take interest in the
application
if user interface is friendly. We
then discussed different
tools, which are
used in
the development of any
application. In this lecture we will
see the designing
of input
forms.
An input
form is an easy, effective,
efficient way to enter data
into a table. Input
forms
are especially useful when
the person entering the data is
not familiar with
the
inner
workings of Microsoft Access
and needs to have a guide in
order to input data
accurately
into the appropriate fields.
Microsoft Access provides
several predefined
forms
and provides a forms wizard
that walks you through
the process of creating
a
form.
One of these predefined
forms will be used in the
example below. You can
also
create
your own customized forms by
using Microsoft Access form
design tools.
Following
things must be ensured for input
forms:
� Forms
should be user
friendly
�
Data
integrity must be ensured, which means
that database must represent
the
true
picture of real
system.
�
Checks
can be applied within the
tables definition or through
input forms
246
Database
Management System
(CS403)
VU
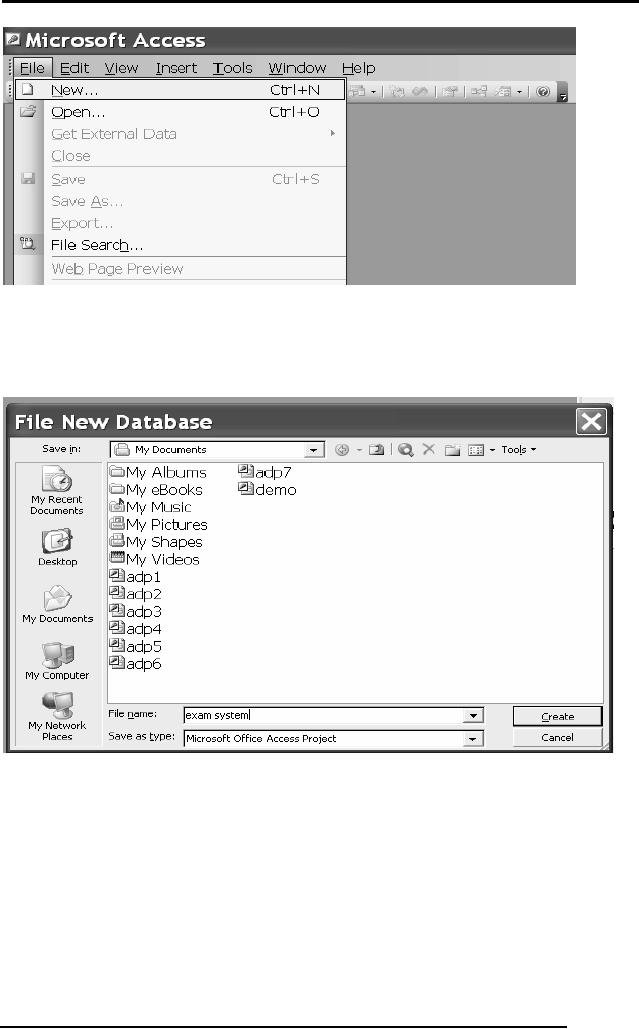
So first
we will run MS Access and select
New option from the
file. Next it will
ask
the
name of database as
follows.
We have
given the name as Exam System, we will
then press the create
button and
following
screen would be
available.
247
Database
Management System
(CS403)
VU
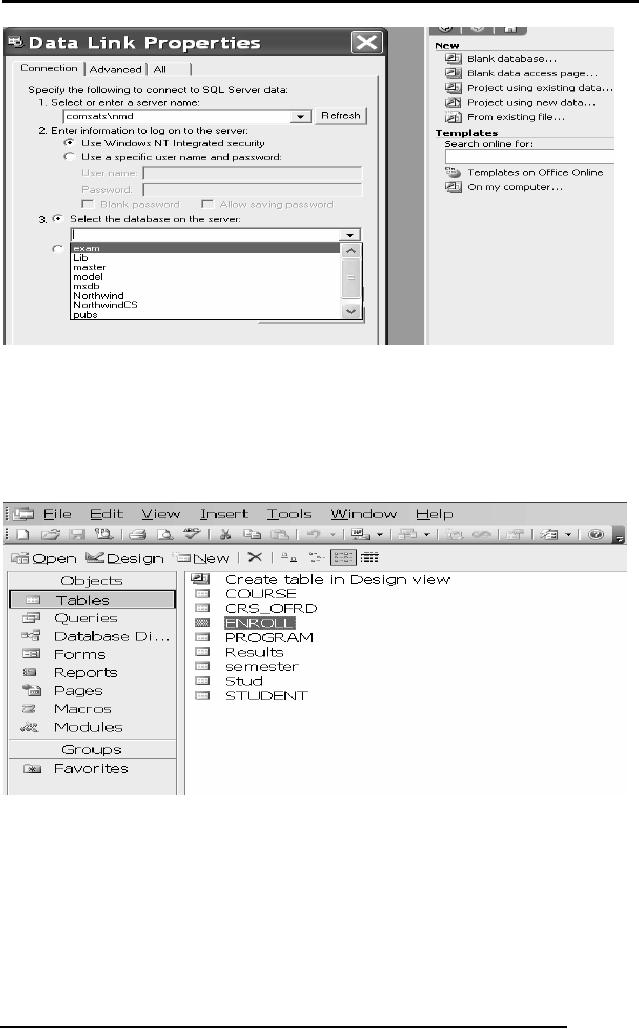
In this
screen we will first select project
using existing data from New
templates, as
we are
using data of SQL Server
that is why we are using
this option. Next move
on
to Data
Link Properties dialog,
which is adjacent one. So
first select the
connection
Tab in
which first select the server name
then is the security setting
after selecting that
option
then is the selection of
database on which forms are
to be constructed.
Now
these are the tables of
Exam Data base, with
which connectivity has
been
established.
Now we will select the Forms
option as under:
248

Database
Management System
(CS403)
VU
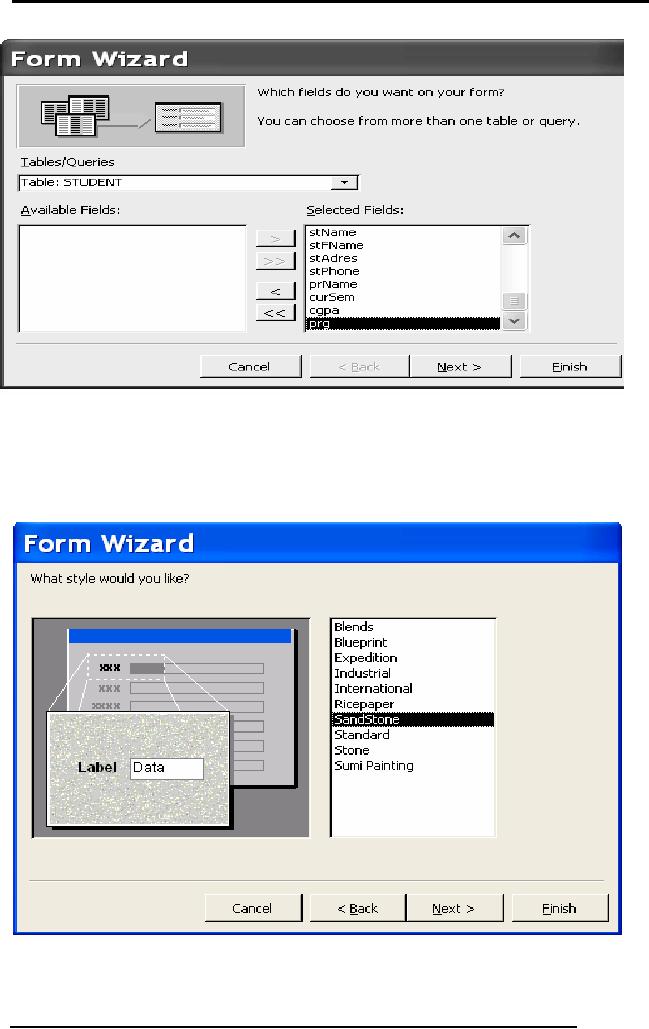
So here
are two options in design
and wizard both we are
selecting wizard view
after
selecting
this next screen would be as
under:
Now here
we will select the concerned table
and initially we are selecting
single table
that is
of STUDENT. Next is the
selection of required attributes
for the concerned
table as
under.
249
Database
Management System
(CS403)
VU
Then is
the selection of required
layout for the form.
There are different
options
available
in this option. We can select
the required option. We have
selected Column
option
for the layout of forms.
Then is the selection of
background or style for
our
forms as
under. We have selected the SandStone
option.
250
Database
Management System
(CS403)
VU
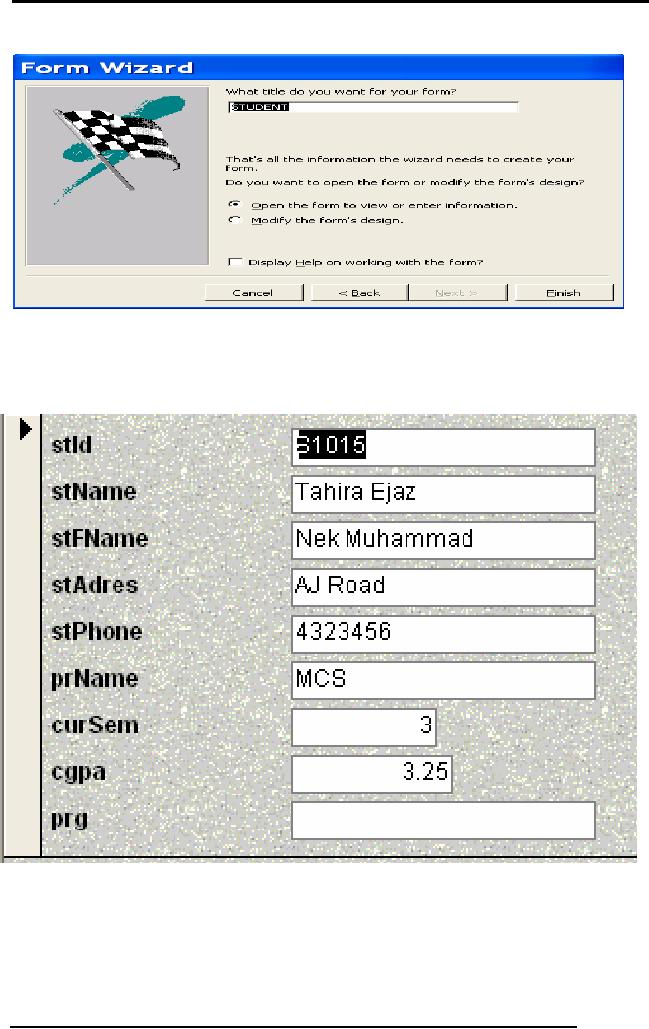
Next is
the selection of title for
the form as under.
Next is
the form view as under in
which we can view our
data.
251
Database
Management System
(CS403)
VU
Forms must be
designed and arranged in a systematic
manner now
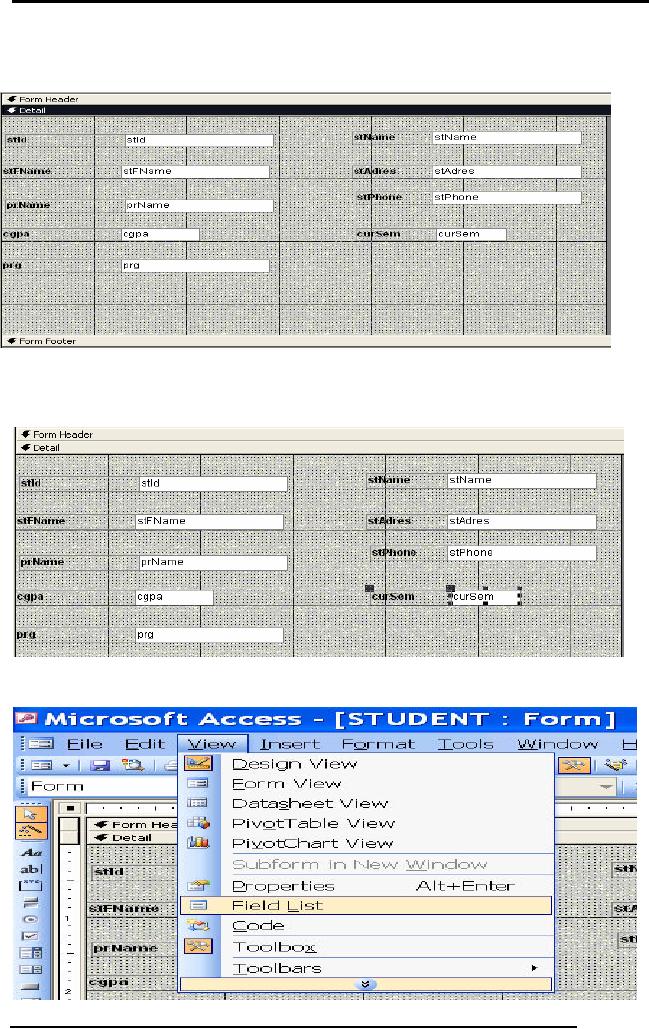
Next is
deleting a field from the
form.
If we
want to add an attribute in
the list.
In this
example, a command button beside
each record is used to open
another form.
252
Database
Management System
(CS403)
VU
Open
the form in Design View
and ensure that the
Control Wizard button
on
the
toolbox is pressed
in.
Click
the command button icon on
the toolbox and draw
the button on the
form.
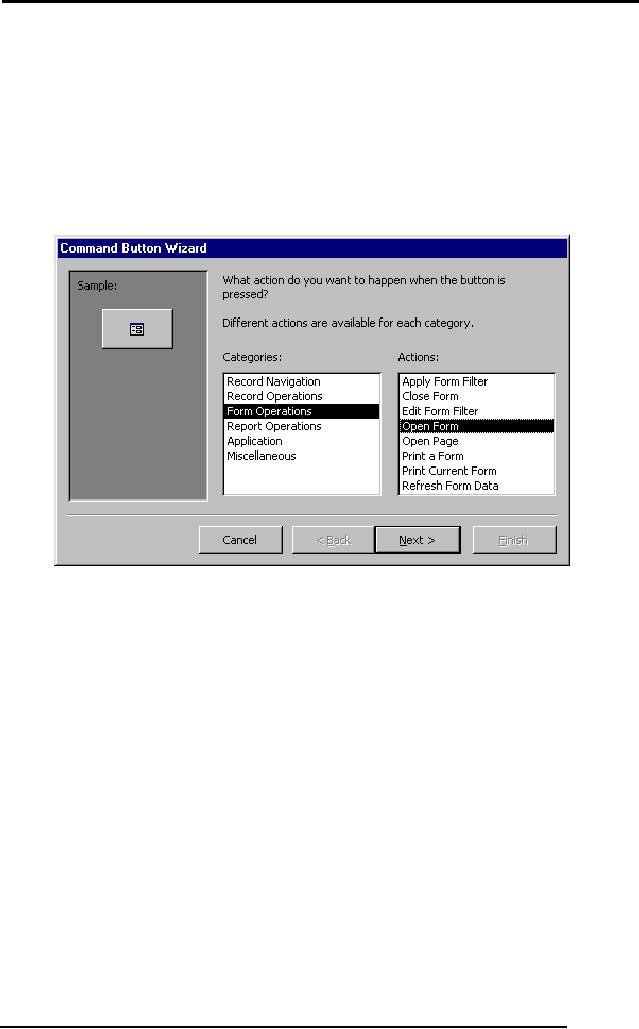
The Command Button Wizard
will then appear.
On the
first dialog window, action
categories are displayed in the
left list while
the
right list displays the
actions in each category. Select an
action for the
command
button
and
click
Next
.
The
next few pages of options
will vary based on the
action you selected.
Continue
selecting options for the
command button.
Choose
the appearance of the button by
entering caption text or
selecting a
picture.
Check the Show All Pictures
box to view the full
list of available
253

Database
Management System
(CS403)
VU
Click
Next
>.
images.
Enter a
name for the command button
and click Finish
to
create the button.
In
today's lecture we have
studied the designing of
forms. Forms are used as
an
alternative
way to enter data into a
database table. It can be
made more perfect
with
lots of
practice and designing
number of forms. So it needs
practice. We have
designed
a simple form through
wizard. A more complex form
can also be designed
with
some practice.
254
Table of Contents:
- Introduction to Databases and Traditional File Processing Systems
- Advantages, Cost, Importance, Levels, Users of Database Systems
- Database Architecture: Level, Schema, Model, Conceptual or Logical View:
- Internal or Physical View of Schema, Data Independence, Funct ions of DBMS
- Database Development Process, Tools, Data Flow Diagrams, Types of DFD
- Data Flow Diagram, Data Dictionary, Database Design, Data Model
- Entity-Relationship Data Model, Classification of entity types, Attributes
- Attributes, The Keys
- Relationships:Types of Relationships in databases
- Dependencies, Enhancements in E-R Data Model. Super-type and Subtypes
- Inheritance Is, Super types and Subtypes, Constraints, Completeness Constraint, Disjointness Constraint, Subtype Discriminator
- Steps in the Study of system
- Conceptual, Logical Database Design, Relationships and Cardinalities in between Entities
- Relational Data Model, Mathematical Relations, Database Relations
- Database and Math Relations, Degree of a Relation
- Mapping Relationships, Binary, Unary Relationship, Data Manipulation Languages, Relational Algebra
- The Project Operator
- Types of Joins: Theta Join, Equi–Join, Natural Join, Outer Join, Semi Join
- Functional Dependency, Inference Rules, Normal Forms
- Second, Third Normal Form, Boyce - Codd Normal Form, Higher Normal Forms
- Normalization Summary, Example, Physical Database Design
- Physical Database Design: DESIGNING FIELDS, CODING AND COMPRESSION TECHNIQUES
- Physical Record and De-normalization, Partitioning
- Vertical Partitioning, Replication, MS SQL Server
- Rules of SQL Format, Data Types in SQL Server
- Categories of SQL Commands,
- Alter Table Statement
- Select Statement, Attribute Allias
- Data Manipulation Language
- ORDER BY Clause, Functions in SQL, GROUP BY Clause, HAVING Clause, Cartesian Product
- Inner Join, Outer Join, Semi Join, Self Join, Subquery,
- Application Programs, User Interface, Forms, Tips for User Friendly Interface
- Designing Input Form, Arranging Form, Adding Command Buttons
- Data Storage Concepts, Physical Storage Media, Memory Hierarchy
- File Organizations: Hashing Algorithm, Collision Handling
- Hashing, Hash Functions, Hashed Access Characteristics, Mapping functions, Open addressing
- Index Classification
- Ordered, Dense, Sparse, Multi-Level Indices, Clustered, Non-clustered Indexes
- Views, Data Independence, Security, Vertical and Horizontal Subset of a Table
- Materialized View, Simple Views, Complex View, Dynamic Views
- Updating Multiple Tables, Transaction Management
- Transactions and Schedules, Concurrent Execution, Serializability, Lock-Based Concurrency Control, Deadlocks
- Incremental Log with Deferred, Immediate Updates, Concurrency Control
- Serial Execution, Serializability, Locking, Inconsistent Analysis
- Locking Idea, DeadLock Handling, Deadlock Resolution, Timestamping rules